
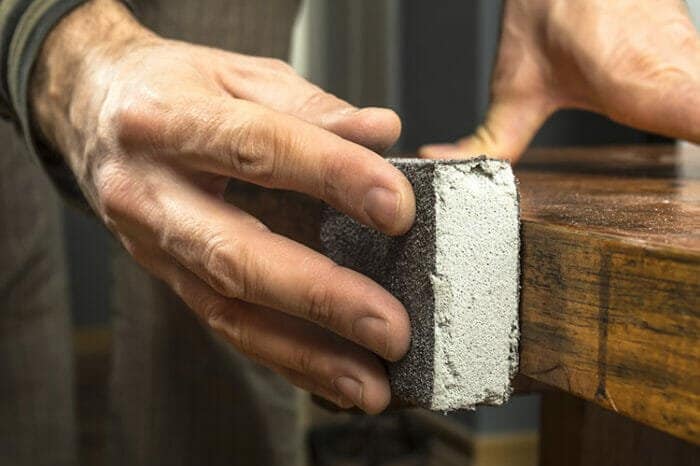
Hand sanding, while taking more time and energy than sanding through mechanical means, allows you a finer degree of control. Hand sanding is often used after mechanical sanding as well as the finest grains allow you to begin polishing and refining the surface beyond what is possible with a machine alone.
Preparing the wood for hand sanding
First of all, you need to clean the surface that you plan on hand sanding. This is to remove as much loose grime, dust, and dirt as possible. This minimizes the work that you need to do when it comes to the sanding part. It is important to remember not to over-sand once you actually get started, as there is a point where over-sanding is irreversible and past the point of repair.
Sanding wood by hand
When sanding, the general rule of thumb is that you need to go from the coarsest grit to the finest grip in terms of what you have available. The finer the sandpaper grit used, the lighter the color of the stain once it is applied. The coarser the sandpaper grit used, the darker the color of the stain once it is applied. You should be thorough and even in terms of your method for going about the sanding itself. You should sand parallel to the grain.
Coarseness
Different grits have different properties, broadly speaking. They are categorized according to groups, and it is the named categories that you should look out for when shopping if you are less experienced at recognizing the grit numbers for what they are.
Very coarse grits will leave a wood finish that is rough and has something of an unfinished quality. This is good for removing knots, gnarled lumps and bumps, and some paint.
Coarse grits result in a rough distressed finish. Now for some, this is what you want. Shabby chic makes its money based off marketing a distressed look that is both rough around the edges and ‘finished’ at the same time.
Medium grits are ideal for removing the remainder of any rough textures. They are also good for stripping off the remainder of any paint if you are doing that at the same time. This is not an uncommon part of refurbishment as well as projects where the construction has started from scratch.
Fine grits are what you need to finish off the bulk of the sanding task before moving on to the staining stage.
Very fine grits are for polishing and finishing off the sanding process as a whole. This can get you that mirror finish that is so desired, particularly after you have applied a stain and varnish. Staining helps to bring out the original color of the wood. Varnishing helps to keep dirt and grime away from the wood.
| Coarse Description | Grit Numbers |
| Very Fine | 600 – 400 – 360 – 320 – 280 – 240 |
| Fine Medium Fine | 220 – 180 – 150 – 120 |
| Medium | 100 – 70 – 60 |
| Coarse | 50 – 40 – 36 |
| Very Coarse | 30 – 24 – 20 – 16 |
Color of sandpaper
When it comes to the different types of sandpaper, different colors indicate different types of sandpaper. Aluminum oxide is brown to yellow/brown. This is the most common type of sandpaper and the one that you most often see in shops and DIY stores. Garnet is reddish and red/brown. Silicon carbide is blue/black or dark gray.
When it comes to color, the stain color is something that you need to consider when getting to the final stages of your DIY project. This pairs with the coarseness that you decide to finish on. If you want a darker color to your wood project and have gone for a fine finish, you may need to go a few shades darker than you originally planned in order to get the hue that you want. Another thing to consider in relation to color is the wood type and porosity. Some woods will ‘take’ a stain better than others. How long the stain is on for will also have an effect. One suggestion is to take a sample bit of wood, prepare it the same way you intend on finishing your project, and use that to experiment with different combinations of wood, sanding, and stain effects.

Milwaukee
Milwaukee Electric Tools 2648-20 M18 Random Orbit Sander

Makita
Makita BO5041K 5-Inch Random Orbit Sander Kit,Teal
Bosch