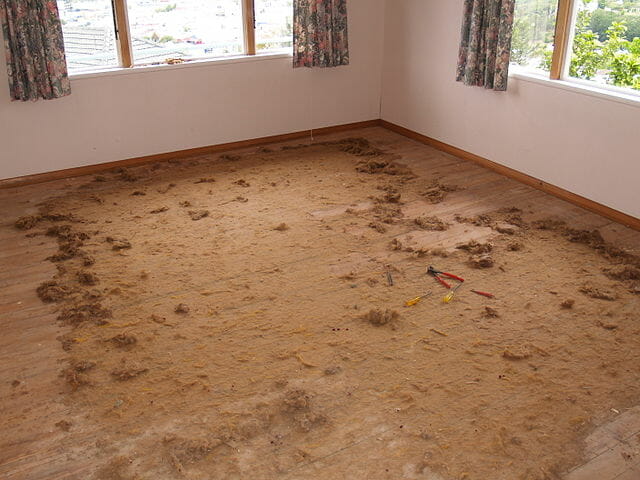
Wooden floors add elegance and chicness to any room. Their beauty has always withstood the test of time. Sanding and varnishing the floor is a sure way to keep it sturdy and vibrant. If yours is a bit tarnished and dusty, you need to get it done pronto. Renovating a hardwood floor is easy to do when you have the right tools and knowledge of doing it.
If you want to learn how to restore wood floors in your home, our renovation guides will help you. You can see the difference afterward when you’ve refinished your floorings!
What you need:
The materials are often available at your local hardware store and would not cost you as much as $100. If you can’t afford to purchase the best orbital sander yourself, then you can borrow an orbital sander from the store or from someone you know. Renovating your floors can be a DIY project!
Main tools
- Hammer and nails
You need to take out any unwanted nails and redo the floorboards.
- Random orbital sander
Orbital sanders would work best than sandpaper and block for a huge project like this. It would ease your sanding concerns.
- Varnish
Varnish gives your wooden floors a durable, clean, and elegant look. It’s used in the final step of renovating a hardwood floor.
- Vacuum
Sanding floors will release tons of dust particles. You need to sweep or vacuum them before it makes more mess. Applying stains and varnish on the floor. Wood floor refinishing without sanding will make the boards bumpy and uneven.
- Floor Pad
Floor pads make cleaning the floors or varnishing them much quicker. Instead of using a brush, you can apply lacquer on more vast spaces. You can also use it for staining and seal floorboards for a fresh new look!
- Sheets or newspapers
If you have fixtures left inside the room, then cover them with dry sheets or papers. You’ll find more work to do when you brush these wood dusts off from them.
Other materials:
- Coveralls
- Masks
- Gloves
- Goggle
- Boots
- Washcloth
- Soap and water
Before You Start Refinishing
Before you can start sanding the hardwood floor, you must get yourself ready. Make sure you’ve prepared the space and moved the furniture away. Since the job would let out dust, you need to gear up some coveralls, masks, and gloves.
- Wear work clothes.
The coveralls will protect you from dirt, grime, and particles that will cling to your shirt. Wearing a suit and gloves when you’re varnishing the floors is also needed. Sanding would bring out wood dust that can fill your airways. That’s why a good pair of goggles and mask is advisable to use to protect you from inhaling the dust.
- Prepare the room.
Remove the furniture and furnishings that are in the work area. Wrap them in sheets and newspapers to avoid dust particles settling on them. Fixtures can be a real problem because they’ll remain in the area. So, wrap them well, lest you’ll find yourself brushing them after your floor renovation.
- Add ventilation and sunlight.
Close the doors and turn off your fans so that wood dust won’t travel. But, you can open the windows to let the light and some ventilation in. The odor of the sealants or varnish is too strong, and so, you need air to lessen it.
You don’t want to start sanding or applying varnish if you’ve come unprepared. Dust particles and varnish smell can be pretty strong and can negatively affect your health. Wearing the proper attire and clearing the space can save you so much hassle.
Guide to Renovating a Hardwood Floor
Take out your tools and materials and get ready to clean your floorboards! First, you must look for imperfections and sand them or insert some wood fillers. Then, bring your wooden floor back to its former glory by following these steps.
- Remove bad nails and fix floorboards.
If nails are jotting out, take your hammer and remove them, lest someone will get hurt! Also, nail any floorboards that have gotten loose. You need to sand and varnish on a flat, even surface.
- Clean the floor.
Once you’re done removing the nails and fixing the floorboards, you have to clean it up. Some people wipe their floors before removing the nails. But then, it’s just a matter of personal preferences. Use a vacuum or a mop to make the floors squeaky clean.
- Place wooden fillers on gaps.
If you have wide holes on your floor, you can place tiny bits of wood that can fit the hollow. For large gaps, you need to bring in new wood to your base.
- Sand the floors.
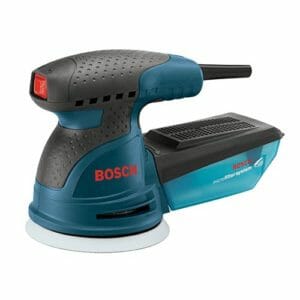
How to sand hardwood floors? You can always use a floor sanding machine like the Bosch ros20vsc orbital sander to even out the surfaces of your wood boards. You can remove imperfections better this way. Start sanding from the end of the room and work your way across the other.
- Clean up wood dust.
Sanding floors will leave tons of dust particles, so use the vacuum and mop with soft soapy water. Or, you can use mineral spirits to wipe your sand-finished floor. Mineral spirits are often used to remove stains on the floor, but it can act as an excellent cleaning agent after sanding the boards.
- Varnish the floorboards.
Apply varnish on the floor starting from the corners up to the other side of the room. Use a floor pad to finish the boards. Try moving it to the same direction of the grain. It’s better to apply two or three coats of varnish for consistency. Wait for two hours before one coat dries and spread over another.
DIY or Hiring a Professional
If you’re a DIY superstar, you can do the wood floor renovation project all by yourself or with help from friends. However, if you lack the time and skills to refinishing it, hiring a pro might be ideal for you.
For DIYers, you need to be aware of the costs of tools and materials and the repairs for the mistakes done. Know your if you’re capable of removing molds or old wood and installing new ones.
Hiring a pro can do all these for you, but you have to be aware of the costs. It’ll include installation, materials used, and cleanup of dust and debris.
Renovating a hardwood floor won’t be a huge headache if you have the right skills and materials. You can always hire a pro if you need some extra help. Wooden floors have always been a beauty to the eyes. Give it extra protection and care, and it’ll live to see a decade or so.


